Test Case Management
The heavy lifting is already done by creating reusable web elements, actions, and assertions. Now all you need to do is create a test case by combining these elements, actions, and assertions. The test case builder is a simple and intuitive interface that allows you to create and manage test cases with ease.
Test Cases
Test Cases are structured sequences of actions and assertions that verify the expected behavior of a web application. Each test case represents a unique scenario to validate functionality, ensuring that critical workflows function as intended. Test cases can include interactions like filling forms, clicking buttons, selecting options, and more, with assertions to perform validation where necessary.
Creating a Test Case
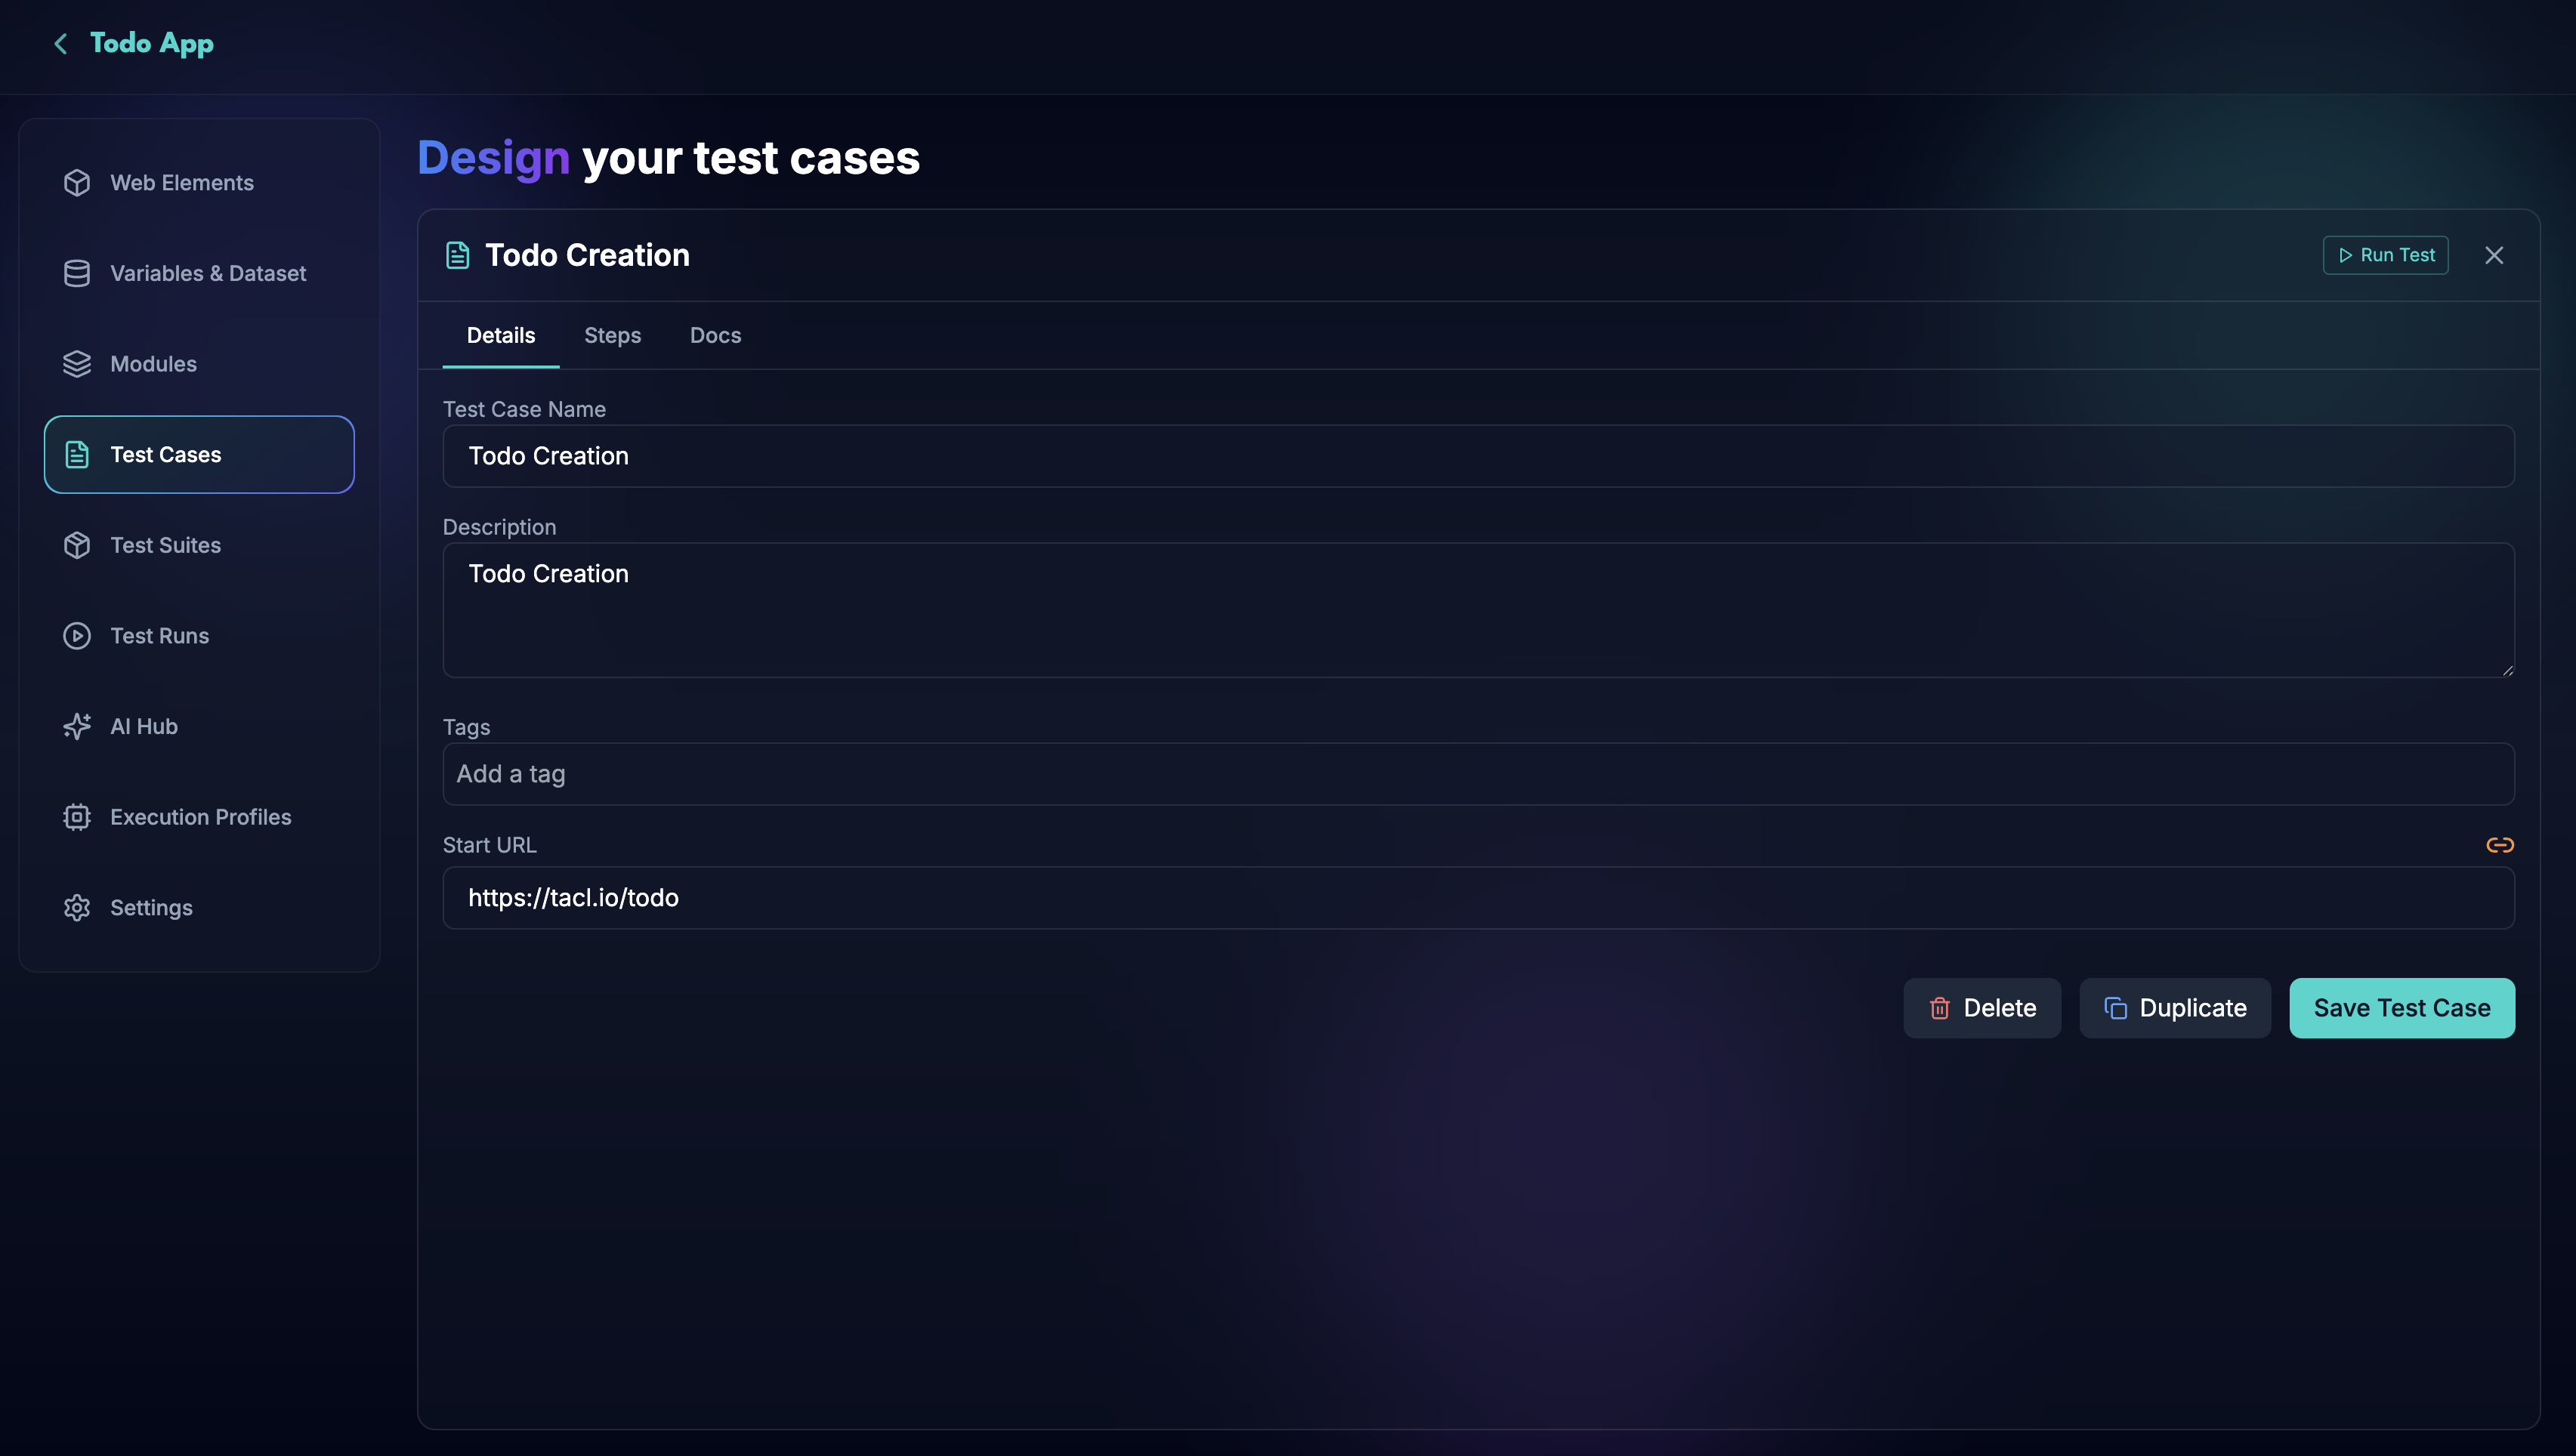
To create a test case in tacl.io:
- Navigate to the Test Cases section.
- Click on Create Test Case.
- Define the test case Name and Description to outline the purpose and context.
- Enter the Start URL where the test case will begin execution. This is the initial page that will be loaded when the test case runs.
- Click Save Test Case to add the test case to your project.
Test Case Builder
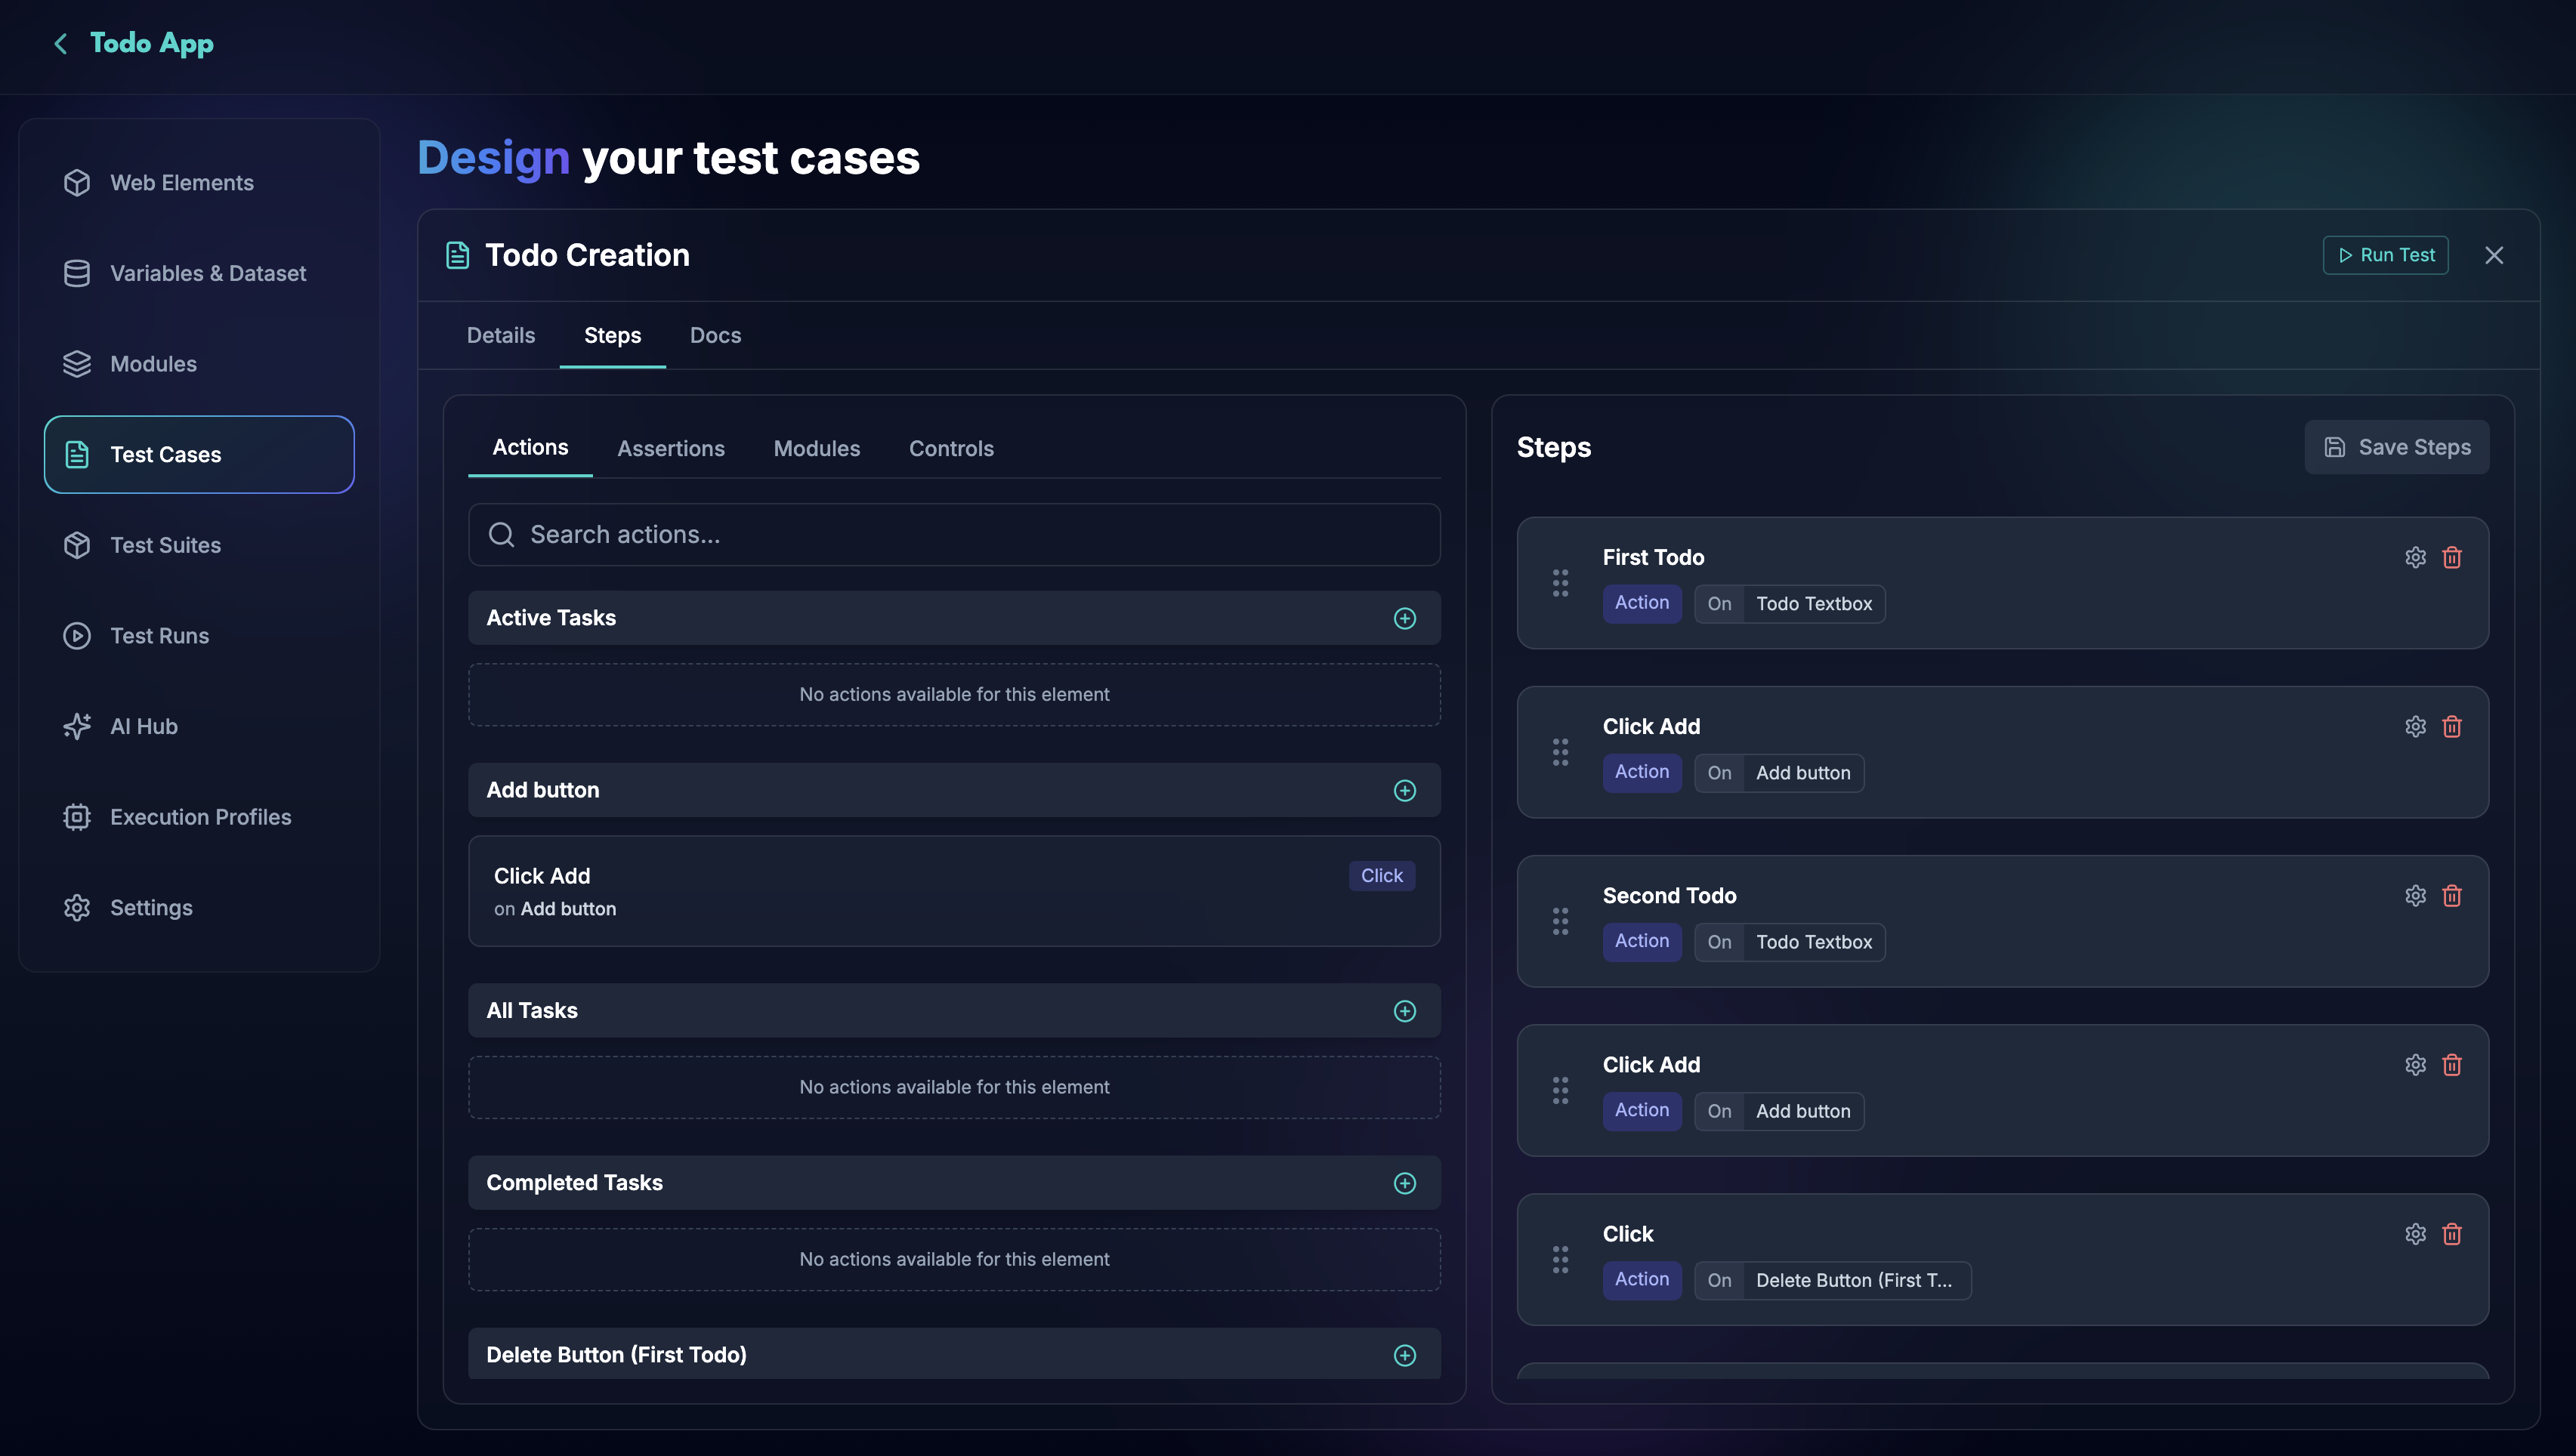
The Test Case Builder provides a user-friendly, visual interface for creating and managing test cases in tacl.io. It can be found in the steps tab of the test case details page. The builder allows you to define the workflow of your test case by adding steps, configuring actions, and setting assertions.
Workflow Builder
The Workflow Builder allows you to add, configure, and remove steps in your test case. Each step can include actions and assertions that define the behavior and validations of the test.
- Adding Actions: On the left side of the builder, you can see a list of available actions of each element under Actions tab. To add an action to a step, drag and drop the desired action onto the step card in the workflow.
- Adding Assertions: Similarly, you can add assertions by dragging and dropping them from the Assertions tab onto the step card.
- Modules: You can also add modules to the test case by dragging and dropping them from the Modules tab. Modules are reusable collections of steps that can be shared across multiple test cases.
- Controls: You can add steps like Screenshot by dragging and dropping them from the Controls tab. Controls are additional steps that can be added to the test case to enhance its functionality, such as taking screenshots or waiting for a specific condition.
- Reordering Steps: You can reorder steps by dragging and dropping them within the workflow.
- Removing Steps: To remove a step, click the Delete icon on the step card.
Step Configuration
Each step in the workflow can be customized with the following configurations:
-
Action Configuration
- Continue on Failure: Decide whether to continue to the next step if this action fails.
- Timeout: Set a custom timeout for this action, overriding the default.
-
Assertion Configuration
- Continue on Failure: Choose whether to proceed to the next step if this assertion fails.
- Timeout: Set a custom timeout for this assertion, overriding the default.
-
Screenshot Configuration
- Full Screen: Capture a full-screen screenshot at this step. When disabled, the screenshot will be limited to the viewport.
- Continue on Failure: Choose whether to proceed to the next step if this assertion fails.
If the actions or assertions is not added to the element, you can add them by clicking on the Add icon in the respective list. This will open a dialog where you can select the action or assertion to be added to the element without leaving the test case builder.
Elements, actions and assertions are reusable components that can be shared across multiple test cases. This allows you to create a library of common interactions and validations that can be easily added to new test cases. When you edit an element, action, or assertion, the changes will be reflected in all test cases that use that component.
Using Modules in Test Cases
Modules are collection of steps that can be reused across multiple test cases. You can create modules for common workflows, such as user registration, login, or checkout process, and include them in your test cases. This allows you to maintain consistency and efficiency in your test automation.
For more details, refer to the Modules guide.
The Test Case Builder simplifies test case management, allowing you to structure, customize, and execute complex workflows with ease.
Once you have created or updated a test case, you can are ready to spin up a test run to verify the application functionality. To learn more about running test cases, refer to the Run Test Case guide.
Best Practices for Test Cases
- Define Clear Actions and Assertions: Ensure each step has a clear purpose and validation.
- Use Stable Identifiers: Use identifiers like Test Ids, Name, or Role whenever possible to make tests resilient to page changes.
- Limit Test Case Scope: Keep test cases focused on specific scenarios to make troubleshooting easier and execution faster.
- Use Modules for Reusability: Create modules for common workflows to reduce duplication and improve maintainability.
Test cases in tacl.io provide a flexible and powerful framework for creating end-to-end automation, with customization options to match various testing needs.